Intro -
Well, I can’t say this is something I’ll do with frequency, so I might as well write about this path on the meta-blog. We created an informatics podcast recently, available here. From the time we recorded the original podcast to the time we had all steps/automation established, we unfortunately found ourselves in a position of needing to rebrand.
Looking back, this proved most beneficial, as it forced me to reflect on the steps I previously took to create a podcast that harnesses GitHub and Hugo for its RSS feeds. I also prefer the new brand to the old.
I drew heavy inspiration from the Cloud with Chris website/podcast, whose efforts are available under the open source license. They also have a cool setup where anyone can post podcast topic suggestions using the GitHub issues section.
Disclaimer: I can’t say every step will be perfect here, but hopefully this can at least give some breadcrumbs on where to look.
Three Repos? Why?
The Code Embers podcast is built on three separate repos, so that I can have a clean separation of concerns. These repos are:
- CONTENT: Code Embers website - This is where I make all changes to site content, including uploading new podcast files + descriptions
- THEME: Cloud theme - This is where I created my specific theme for my own podcast. If people want to fork/modify this theme, they are more than welcome it should be easier than the steps I needed to modify the original.
- WEBSITE: GitHub pages repo - A single repo with all website content, updated via GitHub Actions everytime repo #1 publishes a new commit.
From my end, the first two repos exist as a single folder structure that makes use of a GitHub submodule:

This allows me to rapidly prototype/build locally, while still providing a means for others to build upon my work without having to dive too far into the repo to see what changes were made on a specific section (namely…the theme).
First Setup
If you want to modify this podcast website for your own purposes, follow these steps:
Clone/Fork Existing Repos (#1, #2)
- Clone/fork the content (#1) and theme (#2) repos into your own repository. Create a blank repo for your website (#3)…discussed below.
NOTE: when checking out a repo with submodules, I suggest adding the --recursive tag so that the submodules are checked out automatically. For my repo, I ran
git clone --recurse-submodules https://github.com/FireJuun/code-embers-website.git
Connecting your Submodule(s)
- IMPORTANT You must go into your submodule(s) and connect it to the master/main branch of its original repository. Without first navigating to your new submodule and setting the branch, all commits will be ‘headless’ and won’t be easily accessible on your GitHub repo. This article explains that very well.
cd themes/cloud-theme
git checkout master
Setting up ‘Local’ NPM packages
To run properly via hugo serve -D, this repo needs a few npm package dependencies, which are listed in the package.json file. At the time of this writing, you’ll need to run this command whenever you clone a new repo. You should only have to run this step once.
npm install bootstrap @fortawesome/fontawesome-free
Creating a New Website Repo (#3)
Since there is no need to fork my original for your purposes, just create a new repo with LICENSE, README.md, and .gitignore tailored to your liking, then run
git push -u origin main
For me, this is all I had in my initial commit of my website repo. Without any content on the repo, I would have been unable to publish to GitHub pages.
Connecting GitHub Actions
- GitHub actions is an extremely powerful means of workflow automation for continuous integration / continuous delivery (CI/CD) pipelines. My primary repo (#1) has a setup that will automatically post new content to the site each time I commit a change. Here’s how you can build on that.
First, go to .github/workflows/gh-pages.yml and modify the external_repository to the new repo you created (#3) and your cname to your website’s domain name. In this file, my info is:
      - name: Deploy
        uses: peaceiris/actions-gh-pages@v3
        with:
          deploy_key: ${{ secrets.ACTIONS_DEPLOY_KEY }}
          external_repository: FireJuun/codeembers.com
          publish_branch: main  # default: gh-pages
          publish_dir: ./public
          cname: codeembers.com
Next, follow these steps to create an SSH deploy key. This is what I did:
- In a secure folder (a.k.a. not stored on a public repo or on the cloud), type:
ssh-keygen -t rsa -b 4096 -C "$(git config user.email)" -f gh-pages -N ""
# You will get 2 files:
#   gh-pages.pub (public key)
#   gh-pages     (private key)
- Repo #1 (content) will make use of the private key
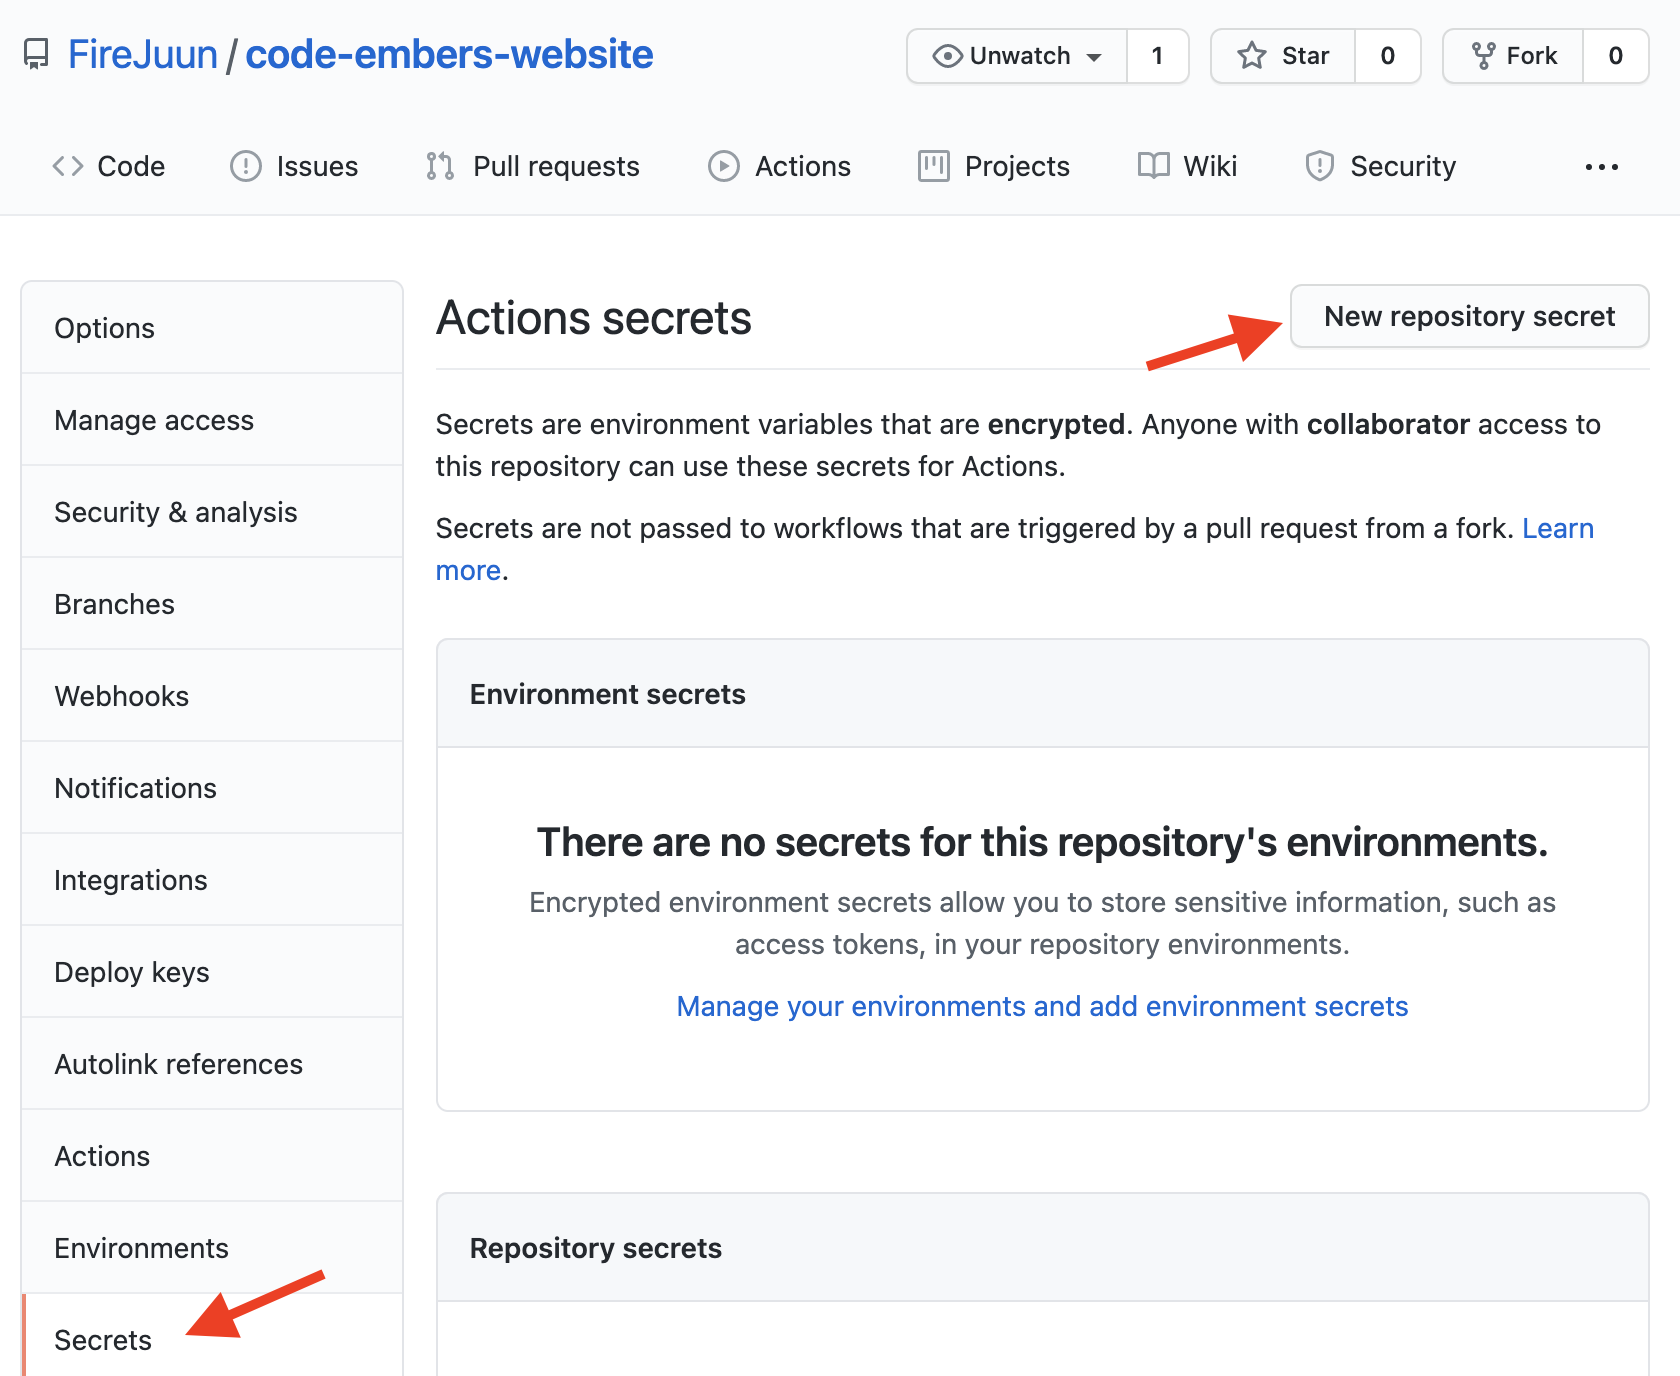
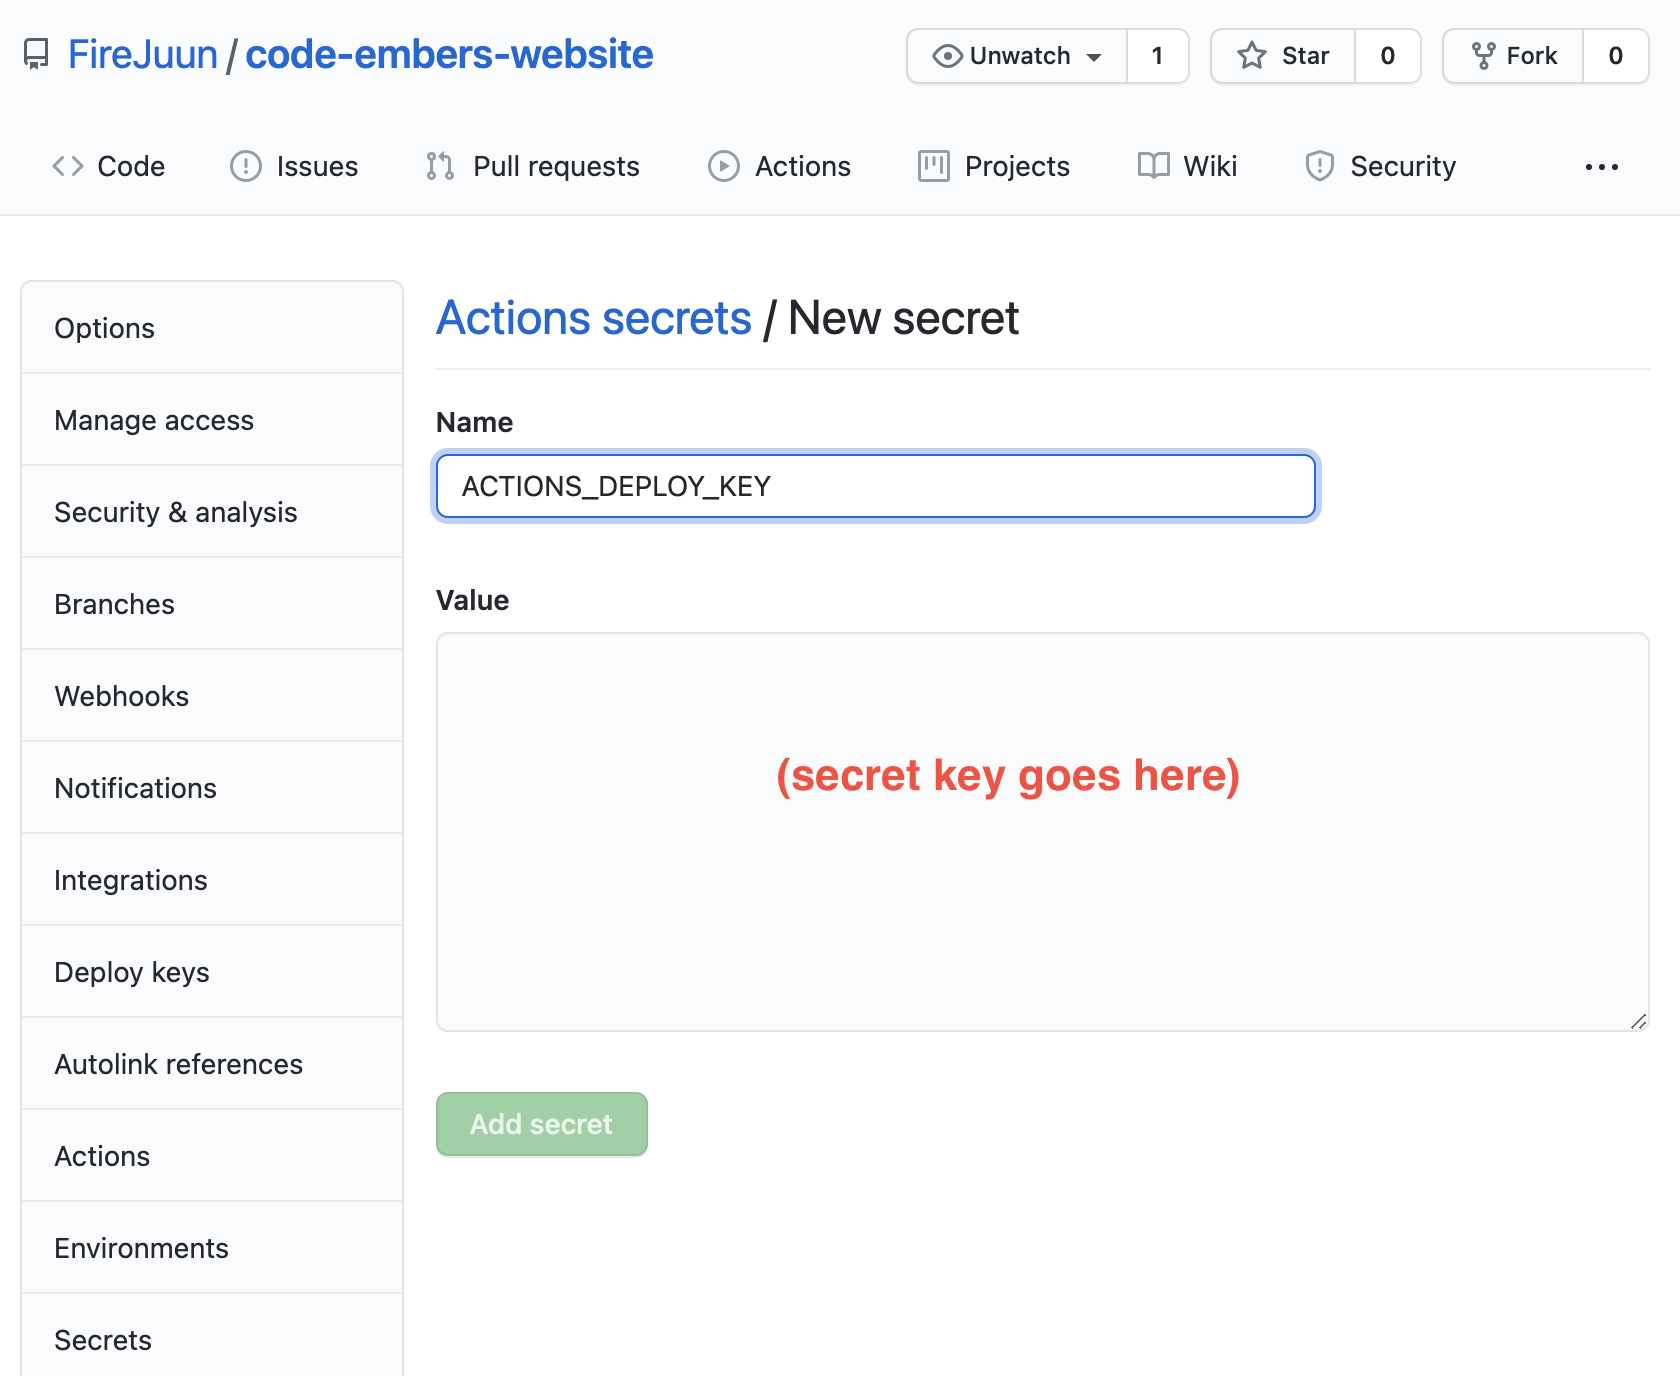
- Repo #3 (website) will make use of the public key
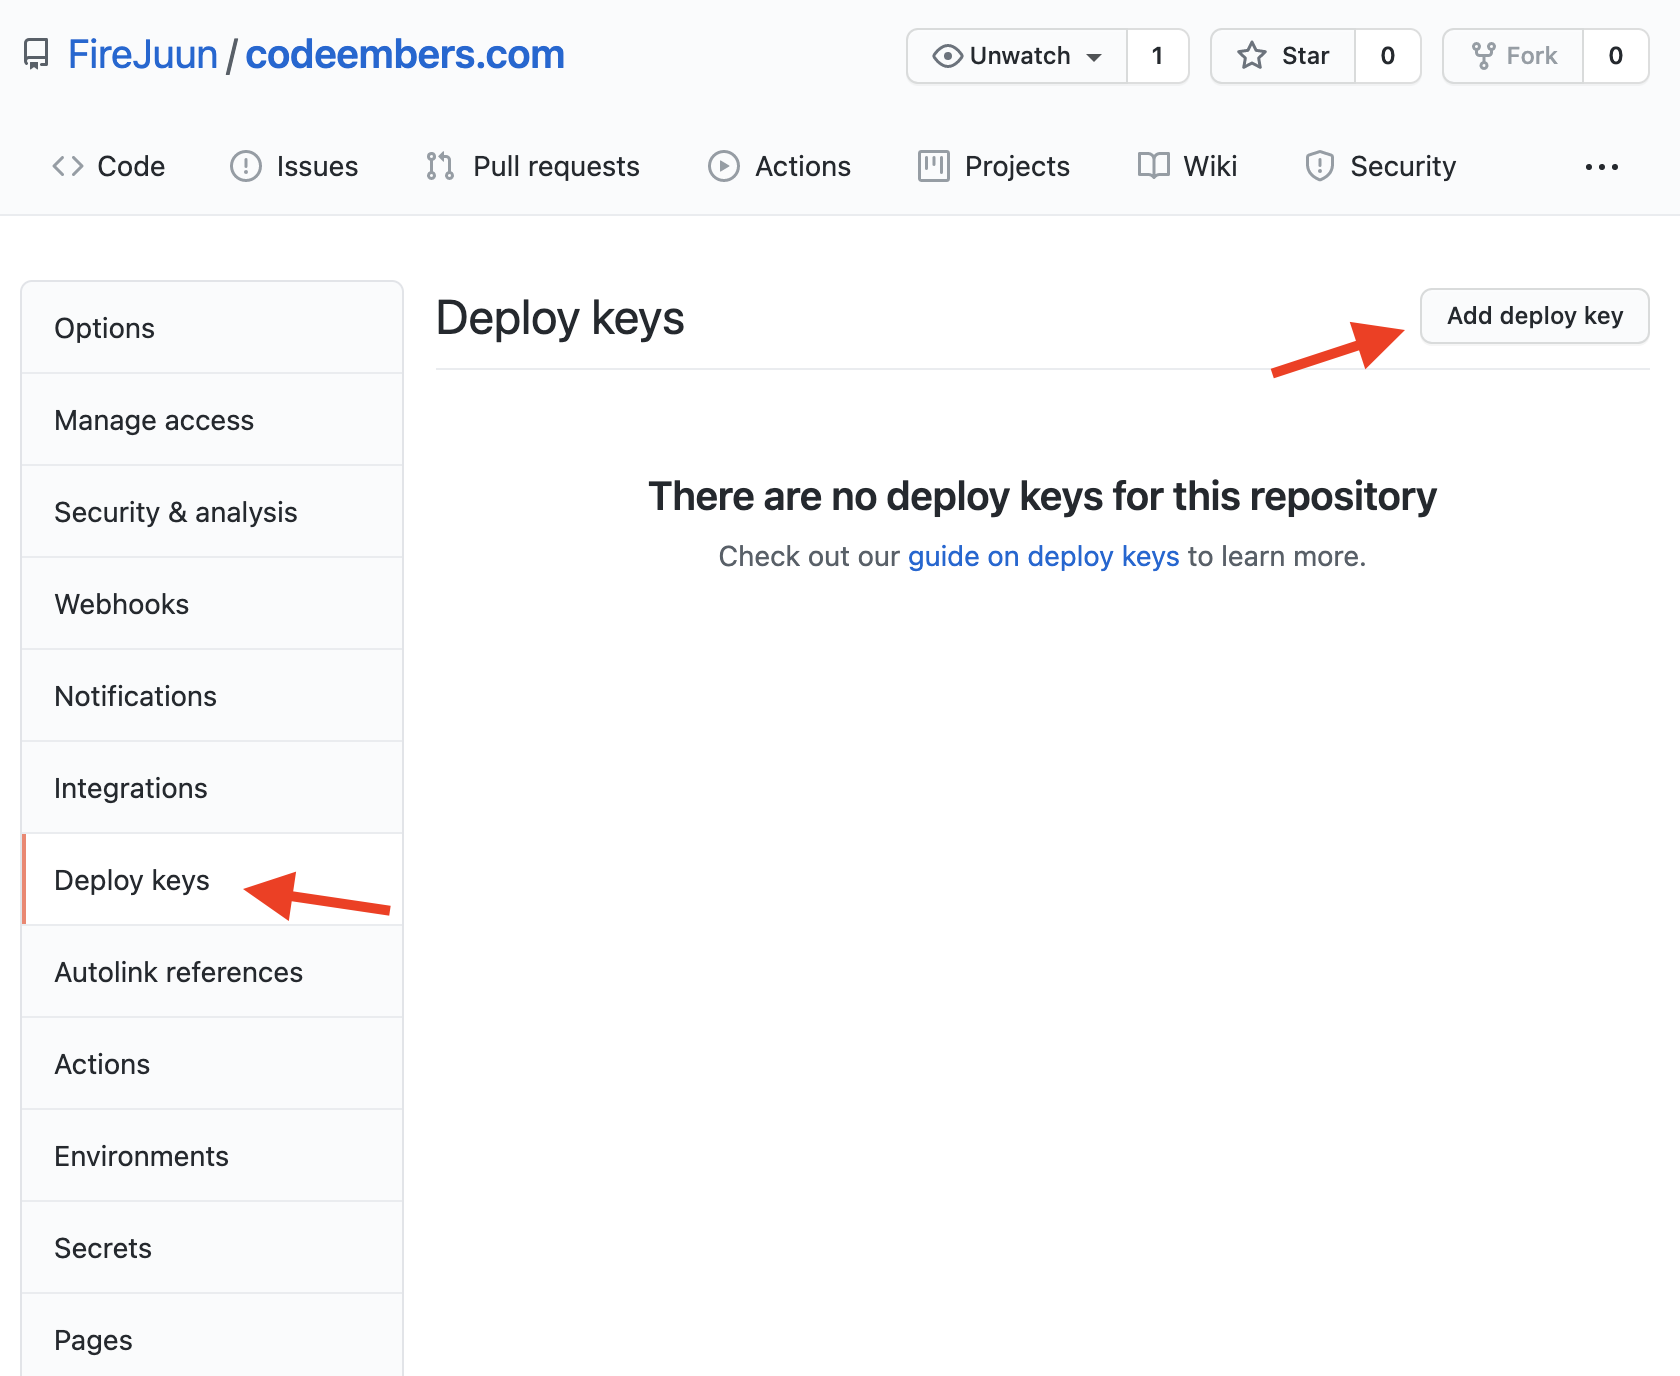
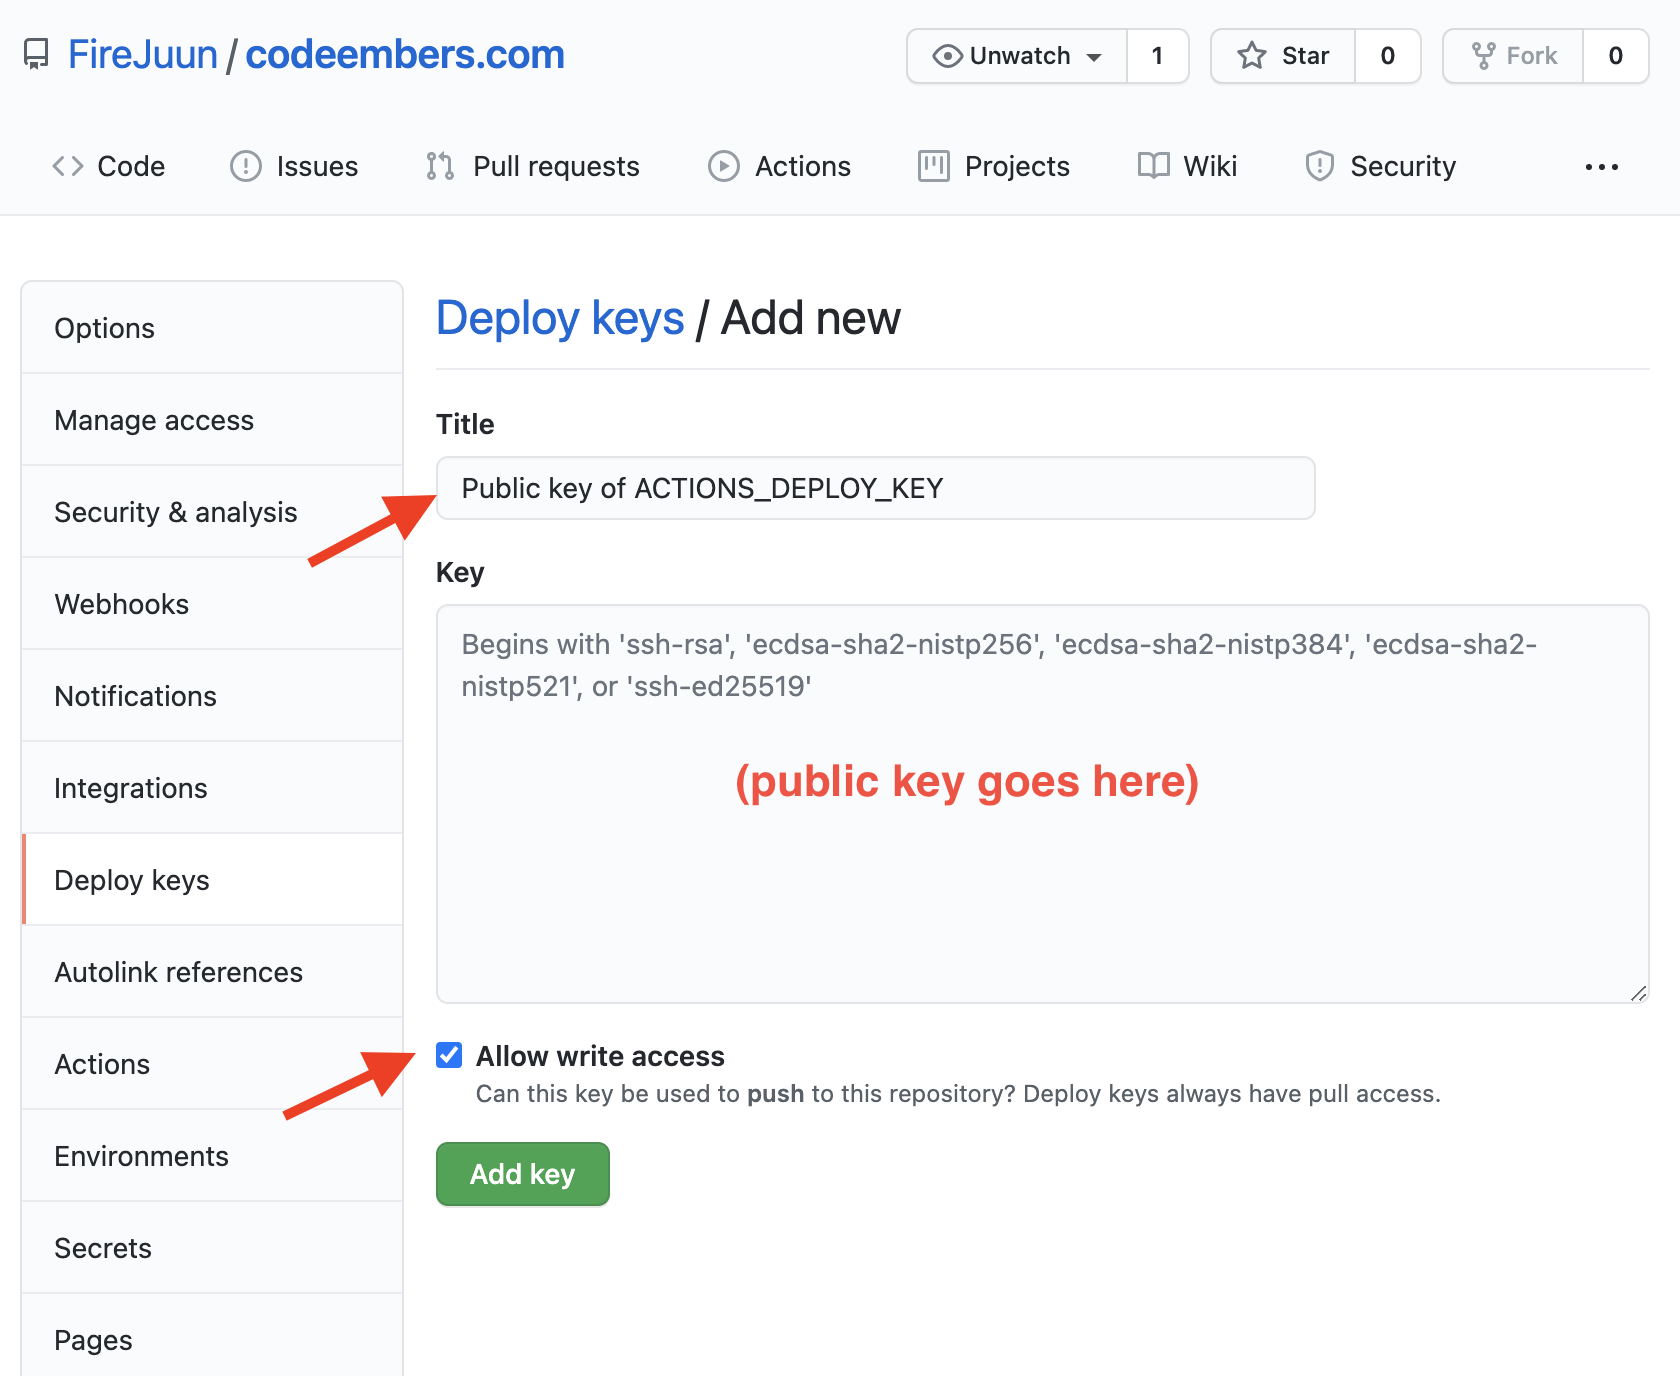
- Finally, setup GitHub pages on your public repo
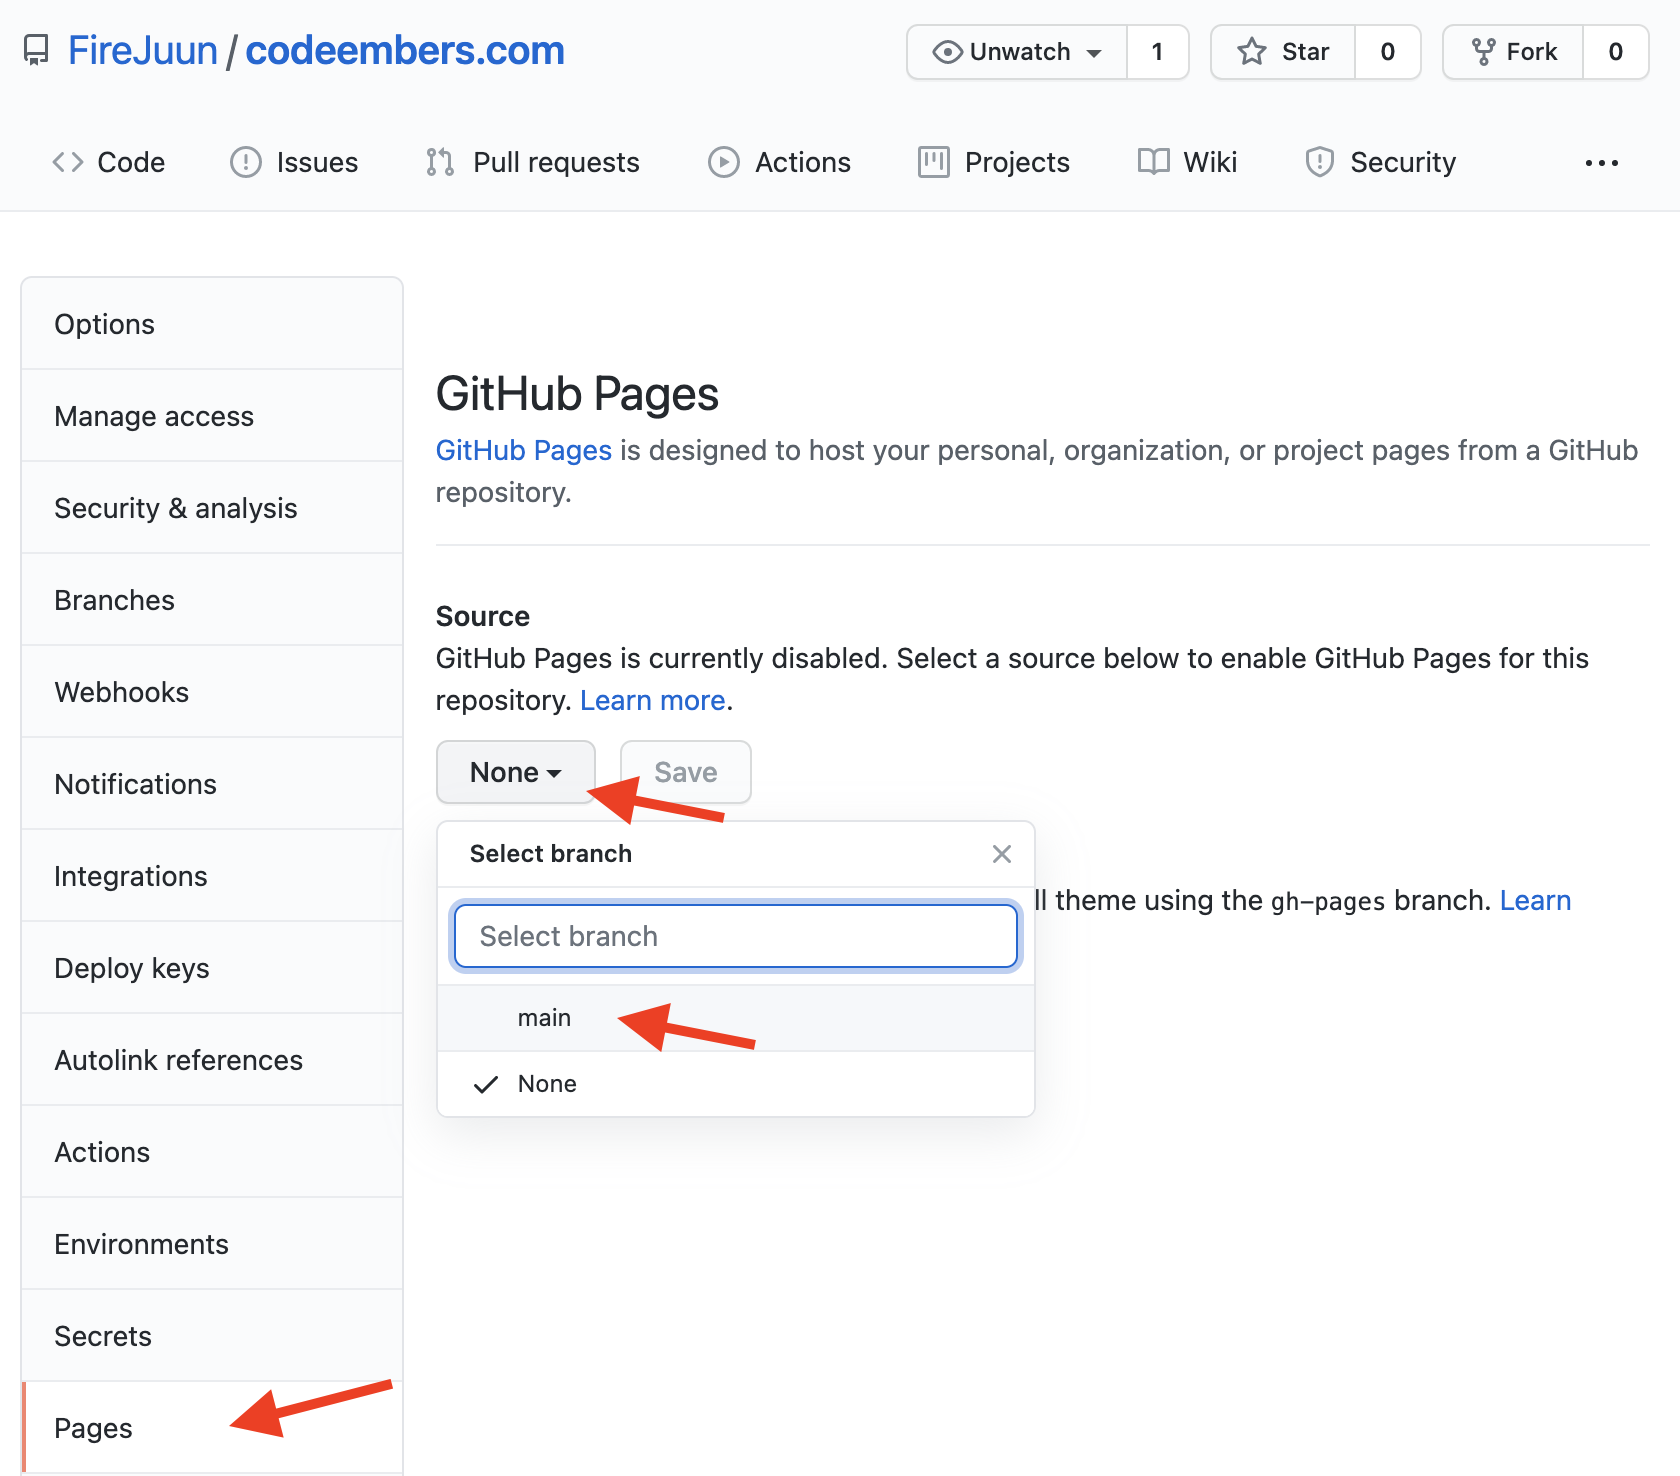
You can connect this to a custom domain (suggested), but those steps are outside the scope of this article.
Building your own Podcast / Brand
Now comes the fun part.
Look over the config.yaml file. I would suggest looking through this on my website and on the Cloud with Chris site. Massive props to Chris Reddington and (originally) Matt Stratton for creating this setup. It’s really powerful.
In a single file, we have:
- The ability to generate your RSS feed, including logo, authors, descriptions, categories, etc.
- The ability to point to iTunes, Spotify, Google Play Subscribe, Stitcher, and Pocketcasts
- The ability to add a list of terms for search engine optimization (SEO)
Most of your efforts should be spent here, modifying the various settings to match your brand. Note that you’ll only have to do this once. After that, each new podcast post is a single markdown file + mp3. That’s it!
You can add hosts in the hosts folder and guests in the guests folder. Very, very cool stuff.
Changing the Theme
Assuming you don’t want the ’twitter’ link to include #CodeEmbers at the end, you’ll want to search for codeembers and code embers within your newly forked theme repo, so that you can modify this to match your own brand.
I haven’t found a clean workaround for this yet, but whenever I modify the theme locally, I make sure that my config.yml file has the theme: "cloud-theme" field enabled and the imports: and - path: github.com/FireJuun/cloud-theme lines commented out.
THEME RUNS LOCALLY
title: "Code Embers"
baseUrl: https://codeembers.com/
theme: "cloud-theme"

...

module:
  # used for importing theme directly from Github
  # imports:
  # - path: github.com/FireJuun/cloud-theme

  mounts:
  - source: "node_modules/bootstrap/dist/js/bootstrap.bundle.min.js"
  ...
This way, whenever I run hugo serve -D, all changes made to any files within the theme submodule are updated in real-time and without the need for any commit. I’m doing this specifically so that, if you decide you want to fork/modify my theme to match your own brand, you can do that without having to sift through all commits I made to my site’s content.
Once I’ve made all changes to the theme (and have committed/published back to the cloud repo), I swap the commented lines back to their original state:
THEME RUNS ON THE CLOUD (default, prior to publish)
title: "Code Embers"
baseUrl: https://codeembers.com/
# theme: "cloud-theme"

...

module:
  # used for importing theme directly from Github
  imports:
  - path: github.com/FireJuun/cloud-theme

  mounts:
  - source: "node_modules/bootstrap/dist/js/bootstrap.bundle.min.js"
  ...
Then, I run:
hugo mod get -u ./...
to update my go packages to include this newly committed theme.
Troubleshooting
Here are some basic troubleshooting steps…just in case you need them
Fix: Reset Submodules
If you ever need to remove a submodule from your repo (for example, to change where cloud_theme is pointing), then here are the steps I’ve found according to this site:
- Remove your submodules (or all of them)
git rm .gitmodules
- Open your
.git/configfile and remove the section that says:
[submodule "themes/cloud-theme"]
 url = https://github.com/FireJuun/cloud-theme.git
- Remove the git cache of this submodule
git rm --cached themes/cloud-theme
Now that your submodule is gone, here is how to connect it from scratch:
- Initialize your new submodule, and re-add the connection
git submodule update --init --recursive
git submodule add https://github.com/FireJuun/cloud-theme.git themes/cloud-theme
- Open the
.gitmodulesfile and set the branch / ignore settings. My preference is to have it so that you only see this change when fully committed, as per this suggestion.
[submodule "themes/cloud-theme"]
 path = themes/cloud-theme
 url = https://github.com/FireJuun/cloud-theme.git
 branch = master
 ignore = dirty
- Navigate to your new submodule and set the branch
cd themes/cloud-theme
git checkout master
Now, whenever you commit a new change, it should work on the proper branch.
Fix: Large File Storage
When I first checked out a newly cloned repo, the new clone had troubles figuring out what to do with the mp3s that were marked as ’large file storage’ items.

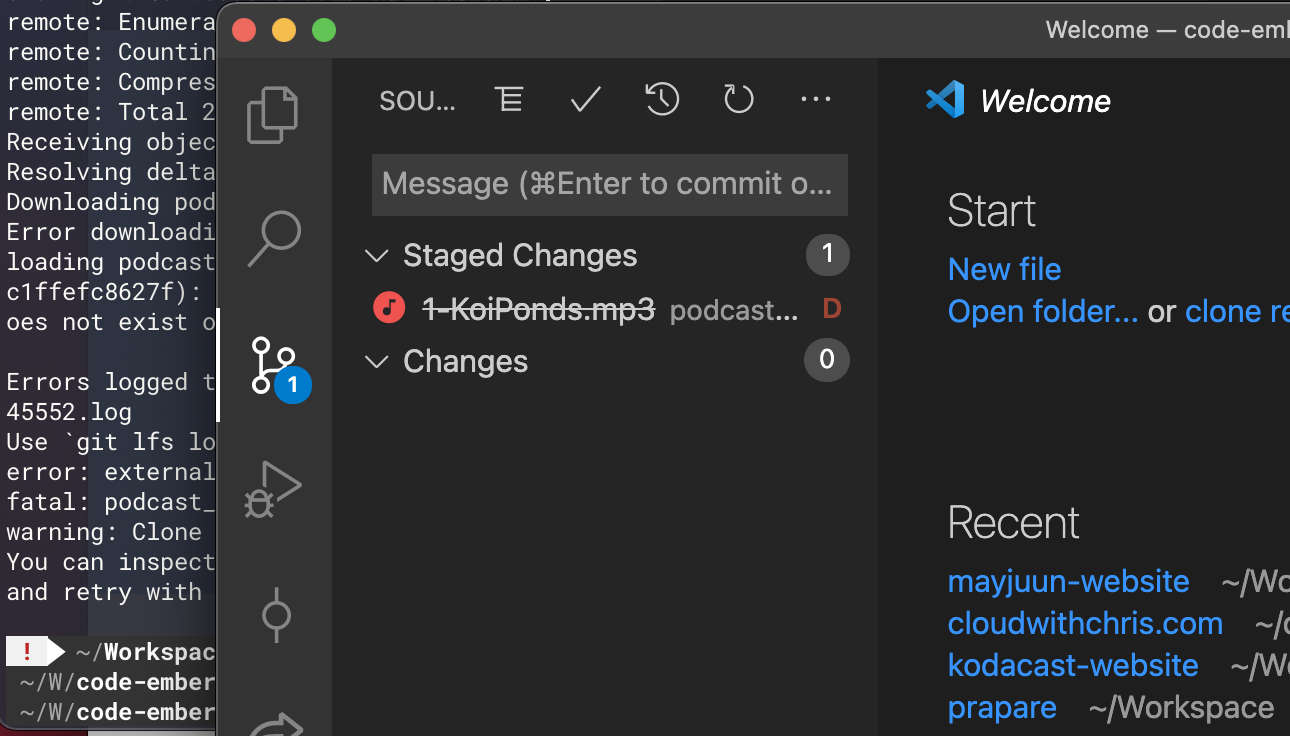
- If you get this error as well, open your new repo in VS Code, go to the Source Control tab, and click the + button to stage your changes…
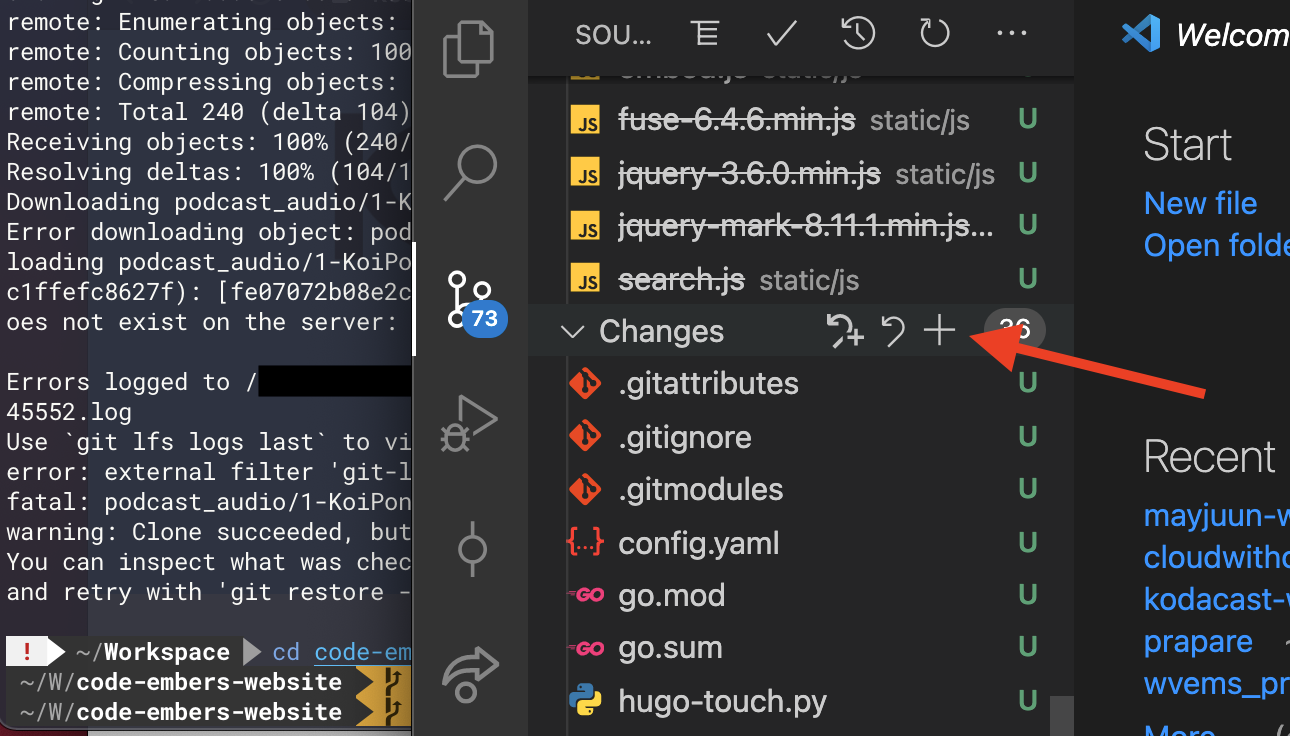
now your error will mostly resolve.
Fix: Go Packages / Hugo Modules
The npm package dependencies for my site are listed in the package.json file. At the time of this writing, you may need to install these packages to get your theme to run locally. You should only have to run this step once.
npm install bootstrap @fortawesome/fontawesome-free
If your theme works as intended when run locally via hugo serve -D, but fails to update when you publish to your site, you need make sure that your config.yml file has the theme: section commented out and that your theme repo has been updated. If that is already done, then running hugo mod get -u ./... should fix all of your problems.
If that doesn’t work for some reson, the way I ‘restart’ my setup from scratch is by running:
rm go.*
hugo mod init codeembers-website
hugo serve -D
- Remove all existing go packages
- Re-initialize this project as a Hugo Module
- Load the site again
That should recreate the files present in this repo to get your theme submodule reconnected.
Conclusion
Most of what I’ve shown today are one-time steps only (+ troubleshooting…just in case). Once you have your new site established, posting new content takes literally seconds. New markdown file + timestamp, new mp3, publish. Best of all, these efforts are free, open source, and incredibly powerful.
Happy podcasting!