
Welcome to the Informatics Meta-Blog -
Knowledge is power…and best shared with others. This is the place where any informatician, innovator, or entrepreneur can crowd-source contribute and build upon each others’ knowledge.
Many of the things I post here will be open-source and moderately technical, but that’s only my preference. If there’s something else you want to share about healthcare, informatics, innovation, or entrepreneurship, please feel free. Try to add/share some knowledge if you can…don’t just post something that’s a shameless plug for your work. I won’t accept those submissions.
By the end of this post, you’ll learn:
- how to contribute to this meta-blog
- how to make an open-source website
Why So Meta
There’s a reason why this will be a ‘meta-blog’. Our plan is to teach and share topics about another topic. The term meta is Greek for ‘after’ or ‘beyond’, but the true beauty of this word is its implied transcendence. Take the following:
- meta-data == data about data
- meta-analysis == analysis of multiple analyses
- meta-cognition == thinking about thought
Put simply, if you are shifting focus from the topic at hand to the factors that surround it, then that’s meta. You are essentially ‘breaking the fourth wall’ on the topic.
It’s fun to be meta. Even the tabletop / D&D podcast The Adventure Zone will regularly host ‘meta-episodes’ (their title), where they talk about the overarching story in general and provide Q&A. If you want to see a meta-episode in action, just look for The The Adventure Zone Zone.
Clinical Informatics: A ‘Meta-Specialty’
The Clinical Informatics Subspecialty (CIS) is incredibly broad. The Accreditation Council for Graduate Medical Education (ACGME) defines it as “the subspecialty of all medical specialties that transforms healthcare.” Personally, I think Clinical Informatics is a meta-specialty…not a subspecialty. We all have so many strengths / passions / interests, clinical backgrounds, and career paths that it can be difficult to characterize succinctly. KOI Pond was created for this very purpose.
The Meta-Blog
Now with all of that meta stuff out of the way, let me show you how to contribute to this blog and how to make a website.
Contributing to This Blog
Anyone can make a static website these days, and if you crowd-source build on an open-source foundation, the path forward can be very rewarding. I'm using the open-source static site generator called Hugo, implemented with a custom open-source theme (+ my own mods).
If you’ve never worked with GitHub Pull Requests, start by watching this 2 minute video:
The entire website exists as two Github repos:
- the repo where I make all changes: mayjuun-website <— fork this repo!!!
- an auto-updated repo that makes a GitHub page
On my end, repo #2 is what this website actually displays. I make use of two convenience scripts (update, deploy) to automate all my Git commands for this repo. All I have to do is open a terminal in ths mayjuun-website folder and type:
./update.sh
./deploy.sh
…and I’m done. Website is accurate, with all changes implemented and all my layout/content changes tracked in their own separate repo (#1). Update. I am now using GitHub actions to automatically update this website on commit. No need for custom shell scripts.
Creating a Post
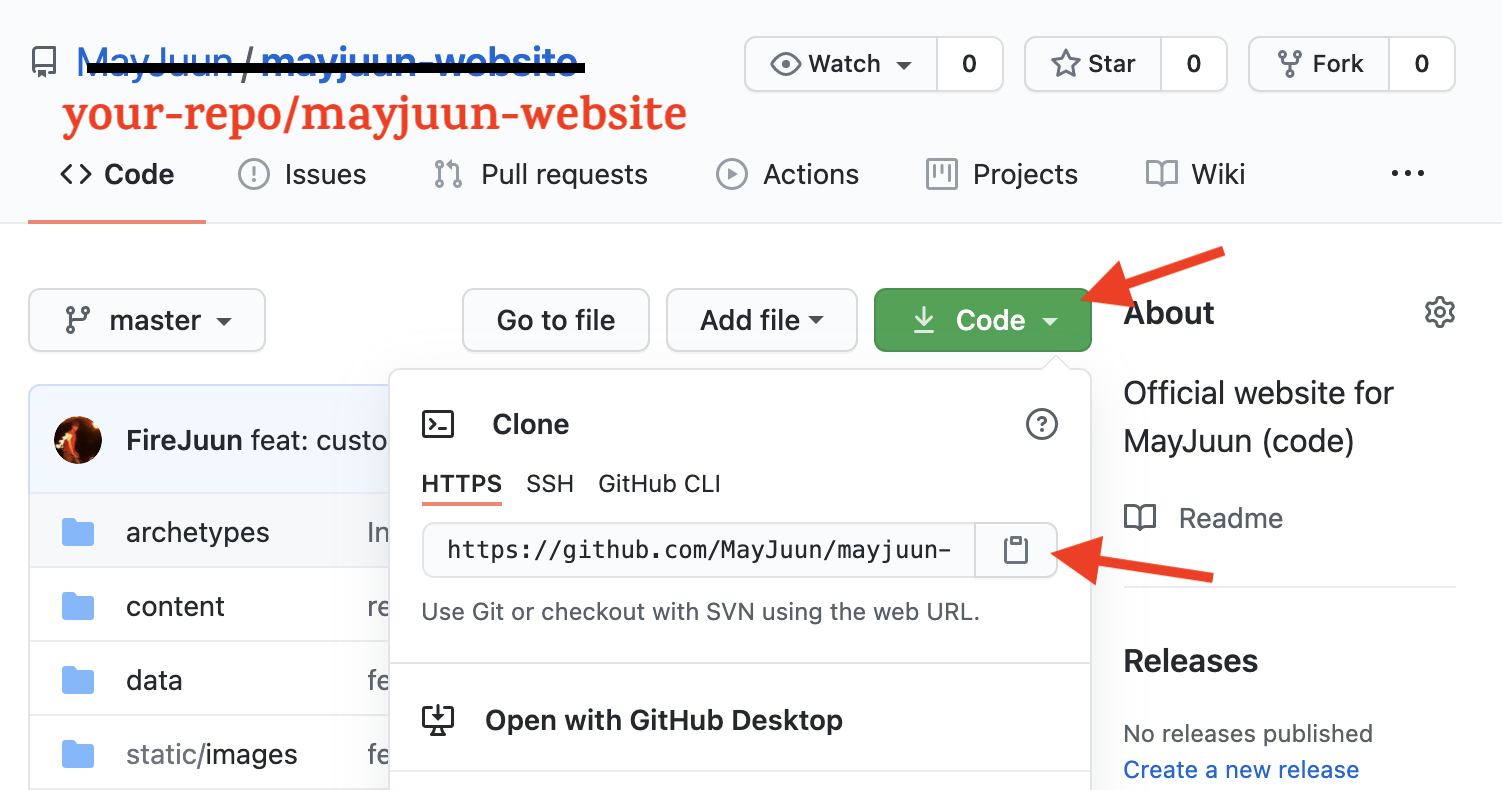
If you haven’t yet, fork my mayjuun-website repo.
Go to the new fork you just created, and clone it to your desktop.
In terminal, in that folder, create a new branch, and make whatever edits you want in your favorite IDE, such as VS Code.
Create a new Markdown file in the blog directory /content/blog/##-MY-POST.md. Usually, I’ll just copy the previous post, update the tags/images at the header, and delete all the text. I put all images for that post in the /blog/###/images/ folder to keep things organized. Finally, if you have Hugo installed as shown below, you can run hugo serve -D in terminal at the mayjuun-website folder to see a local copy of this site. This way, each time you save a file, you can see all layout changes in real time.
The Markdown Cheat Sheet is a handy resource for Markdown formatting. Feel free to look at the other .md posts as well for tips on handling hyperlinks, videos, etc. Keeping with the open-source theme, consider using Pexels, Unsplash, or Pixabay when choosing stock images. Finally, if you need an image with custom sizing instead of the default , use this snippet with img-right, img-left, or img-center based on intended alignment and with your custom width for that image:
{{< figure src="/blog/###/images/YOUR-IMAGE.PNG" title="YOUR TITLE" class="img-right" width="75%" >}}
Here’s an example of what a Markdown file looks like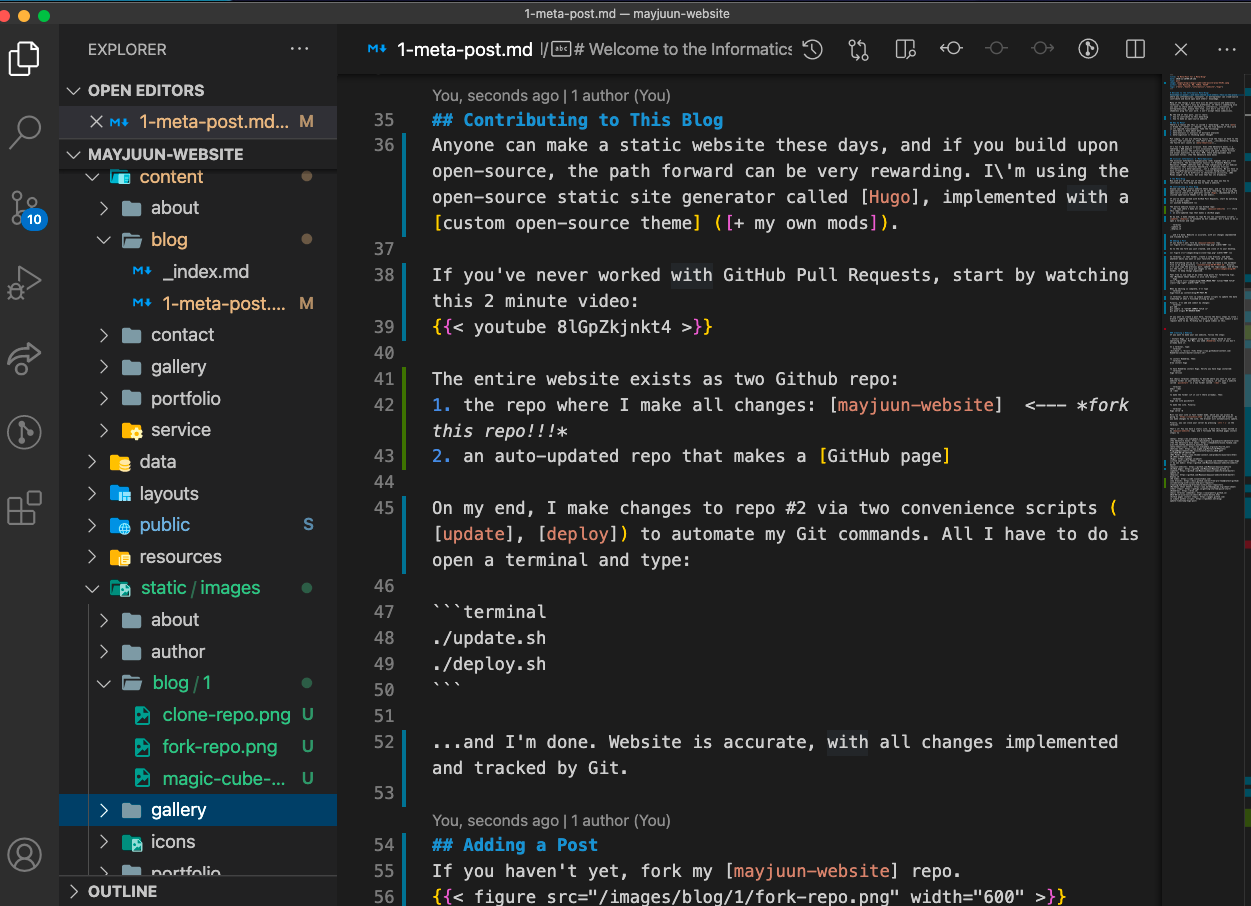
Submitting a Post
When you’re done editing, open a terminal in the repo’s main folder and type:
python hugo-touch.py content/blog/##-MY-POST.md
This runs a simple python script to update the date: timestamp at the top of the file. This timestamp represents the time a post has been finalized and is used to sort blog posts.
Finally, add and commit your changes. You can use the command line, such as was shown in the above YouTube video:
git add .
git commit -m "CATCHY COMMIT TITLE 😎"
git push origin MY-BRANCH-NAME
…or you can use VS Code directly, which is my preference. You’ll want to make a pull request on my repo so that I can implement your changes, which is covered in both the YouTube video and on this site.
Creating a Website
If you want to make your own website, follow these steps:
- Install Hugo. I’d suggest using their steps based on your operating system. For Mac, you need Homebrew first if you don’t already have it. To install Homebrew, open a terminal and type:
/bin/bash -c "$(curl -fsSL https://raw.githubusercontent.com/Homebrew/install/master/install.sh)"
- Then use Homebrew to install Hugo:
brew install hugo
- And verify you have hugo installed:
hugo version
- You can use Finder/Explorer or you can use basic terminal commands to decide where you want to put your website folder on your machine. For example, if you want a website called
quickstartin a new folder called~/devon Mac/Linux, type:
mkdir ~/dev
- Then navigate to that folder:
cd ~/dev
- And use Hugo create a brand new site:
hugo new site quickstart
- Navigate to the new folder you created:
cd quickstart
- And run a local server with the command line:
hugo serve -D
This will run your site in fast render mode (which is the -D flag). You can access this site when the server is running by going to https://localhost:1313 in your preferred web browser. If you ran this same command hugo serve -D in another folder, such as where you forked/cloned my mayjuun-website repo, then you can run a local version of that website instead. As you make changes to the site locally, the browser will automatically update each time a file is saved.
Finally, you can close your server by pressing ctrl + c in the terminal. That’s it! You now have a static site!
Let me know if you want me to cover other content about static sites. Next post, I’ll plan to cover some Flutter-related content.
–John